Feeds:
Posts
Comments

Archive for the ‘Innovative and Unconventional’ Category

Cooking 014

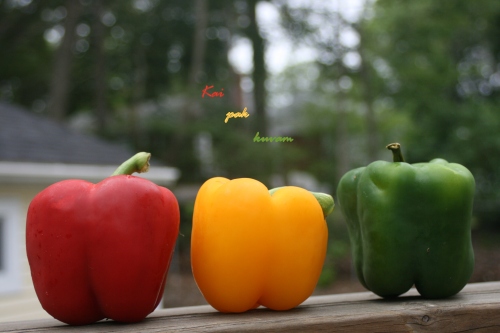
The term “bell pepper” is the American name for some vegetables of the Capsicum annuum  species of plants. The misleading name “pepper” (pimientoin Spanish) was given by Christopher Columbus upon bringing the plant back to Europe. It comes in an array of vivid colors ranging from green, red, yellow, orange and more rarely, white, purple, blue, pink, rainbow, aqua, violet, maroon, black and brown, depending on when they are harvested and the specific cultivar. Green peppers are less sweet and slightly more bitter than red, yellow or orange peppers.

Look like Colorful Christmas Ornaments

A set of traffic lights

Paprika is a spice made from the grinding of dried fruits of Capsicum annuum (e.g., bell peppers or chili peppers). In many European countries, the word paprika also refers to bell peppers themselves. The word “paprika” comes through Hungarian (where it stands for the fruit)  probably ultimately from Sanskrit pippali “long pepper”. Incidentally “Paprika” happens to be one of the pet names, given to my daughter. My SIL, calls my daughter “Paprika”.

Health Benefits of Bell Peppers:

  1. Excellent source of Vit C and Vit A ( beta Carotene).
  2. Rich in antioxidants, which work effectively to neutralize free radicals which cause extensive cell damage.
  3. Bell peppers contain Vit B6 and Folic acid. These two B vitamins are very important for reducing high levels of homocysteine, which in turn reduces heart attack and stroke.
  4. Contains Lycopene, a carotenoid which prevents cancers of the cervix, pancreas and bladder.
  5. Excellent source of fiber.
  6. Vitamin C and beta-carotene content, phytonutrients lutein and zeaxanthin protect against cataracts and macular degeneration.
  7. Studies show protection against Rheumatoid Arthritis.

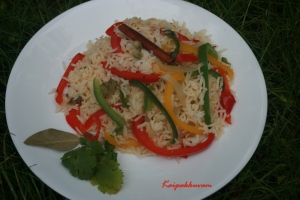
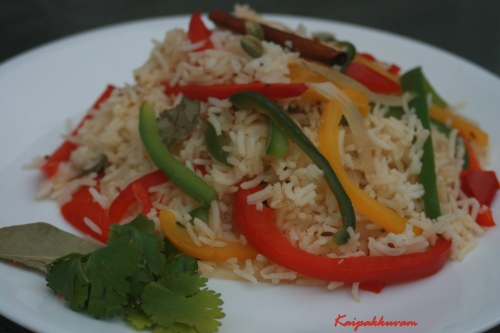
Saw these beautifully shaped Christmas ornaments like bell peppers in the grocers, and decided to experiment something novel with that. It came out very good and my hubby and daughter relished it very much.

Ingredients:                                                                          Cooking 011-1

  • Basmati Rice- 2 cups.                           
  • Tri -colored bell peppers-1 in each color.
  • Jalapeno peppers-2.
  • White Onion-1.
  • Olive oil- 3 tsp.
  • Cumin seeds- 1tsp.
  • Cilantro- 1/4 cup.
  • Salt-to taste.
  • Black pepper- to taste.
  • Cardamom- 5.
  • Bay leaves- 3.
  • Cinnamon stick- 2.                                                               Cooking 013
  • Lime juice- 3tsp.

Method:

  1. Cook  2 cups of Basmati rice with 4 cups of water and set aside.
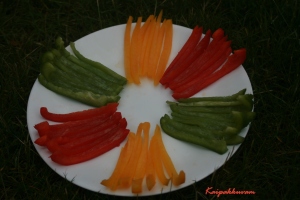
  2. Slit the capsicum( tri -color peppers), onion and jalapenos lengthwise into thin strips.( the entire 3 peppers may not get used completely- the rest may be used as a salad with a dip)
  3. Heat oil in a pan and toss jeera ( Cumin), cardamom, bay leaves and cinnamon.
  4. Add onions and jalapenos and saute for 1 min.
  5. Now add the peppers and saute for 1 min. The peppers should have a crunchy, crisp texture, so don’t cook for too long.
  6. Season with salt, pepper.
  7. Add cilantro and lemon juice for garnish.
  8. Toss this mixture to the cooked rice. Mix well and serve when its still warm with Raita of your choice.

Serves 3-4 people.
Read Full Post »

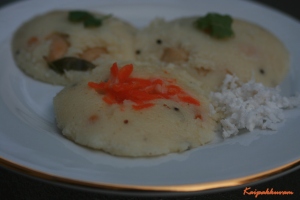
Rava Idli

Rava Idli

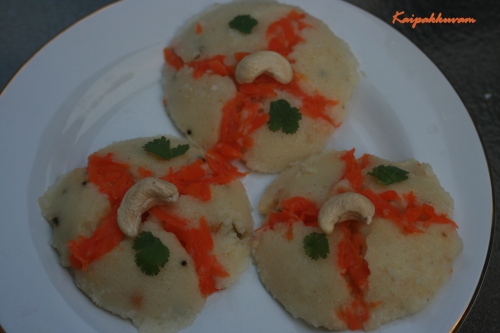
Why get the ready made mixes, when you can make yummy Rava idli’s from scratch, in a snap. It is really simple to make this and it is a very healthy tiffin option  & easy to digest and  most of all kids won’t make a fuss to eat this steamed treat. I also add some scraped carrots to make it more healthy, fun, interesting and colorful.

Ingredients:                                                                     Rava Idlis

  • Bombay Rava- 1cup ( 8 idlis).
  • Green chilly-2.
  • Ginger- 1 inch.
  • Cashew nuts- 10.
  • Oil- 2 tsp.
  • Mustard seeds- 1tsp.
  • Channa Dhal- 1tsp.
  • Curry leaves- an arc.
  • Baking powder-a teeny bit.
  • Salt- for taste.
  • Coconut scrapes-1tsp.
  • Curd- 1/2 cup. (its ok if its is sour).
  • Ghee- 1tsp for coating idli plates.

Method:

  1. Heat oil in a pan and add mustard seeds.
  2. Once the mustard seeds starts splattering, add channa dhal, chopped green chillies, chopped ginger, curry leaves and cashews.
  3. Add Rava to it and roast until it becomes light brown.
  4. Add curd, salt, baking powder coconut scrapes and let  the batter sit for 1o minutes.
  5. Coat the idli plates with ghee and pour the rava batter.
  6. Steam the rava idli’s in a cooker.
  7. In a few minutes, hot rava idli’s will be ready.
  8. Serve with coconut or coriander chutney.

Note:

  1. If required, 2tsp of semiya or (vermicelli) can be added to the rava( semolina).
  2. If you are using scraped carrots, add the scraped carrots to the idli pan in the design you want and then pour the batter.

Read Full Post »

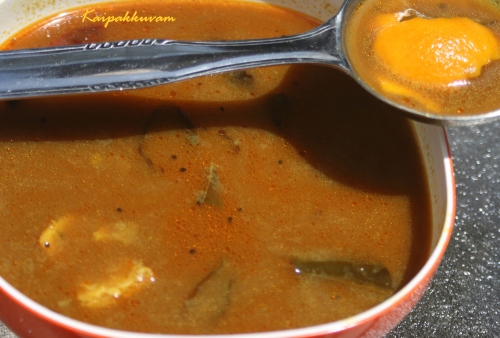
Vathakuzhambu

Vatha Kuzhambu or Vetha Kuzhambu is a tangy gravy that is served with plain white rice. Originally, its  “Vathal-Kuzhambu”-meaning  Vathal-Dried vegetable, which can be preserved for a long time and kuzhambu means gravy. Dried Vathals like Sundakai vathal, Manathakali vathals are used to make this kuzhambu. However, I really like the variations and absolutely love the fact that something that would typically go in a dustbin, can actually be used to make something useful.

Most of the vegetables and fruits have a lot of the vitamins in their peel. But we tend to use the fruit and discard the peel, which is like wasting half of the nutrients. So, I have made it a practise, not to take the peel off from some vegetables and fruits. For instance, Potatoes, Carrots, Cucumbers, Zuccini, Apples, Mangoes, Suppota and few other fruits and veggies can be consumed without taking the peel off. This way, you can fully benefit from the veggies and fruits. But make sure, you wash the skin well to get rid of the wax coat.

Vatha kuzhambu is a food of South Indian Brahmins.  Poor people who couldn’t afford fresh vegetables, would still make this Vathakuzhambu and enjoy a filling and gratifying meal with Vathal kuzhambu & sutappalam( papad, which is just heated in flame and not deep fried with oil). So, it is also called a poor man’s food. It is such a wonderful dish and this orange peel vatha kuzhambu in particular is fabulous, bursting with Citrus flavor and  a mild hint of bitterness. Its also my Yogamba paati’s (my mom’s mother) all time favorite. After travelling for 4-5 days and eating food from outside, your tongue really craves for simple home made vatha kuzhambu.

A variety of Vatha Kuzhambu can be made. Like I mentioned, Sundaikai Vathals, Manathakali vathals can be used. Vegetables like Drumsticks, Red pumpkin, Small onions, Okras, Bringal, Capsicum, fresh sundaikai can be used to make vatha kuzhambu. Use one vegetable at a time, to get a unique tasting vathakuzhambu each time. Another interesting vatha kuzhambu is appalam kuzhambu, where urad dhal papad is fried and used instead of the vegetable. Though the papad gets soggy and soft, it adds an interesting flavor to the kuzhambu.

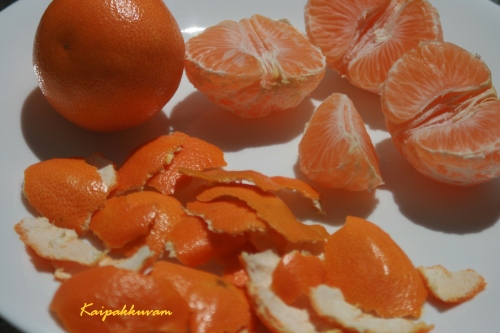
Orange(Clementine) peel

Orange(Clementine) peel

 Ingredients:

  • Clementine peel- from 2 fruits.                                                      Vatha kuzhambu-suttapalam
  • Sambar powder- 3tsp.(refer my previous post)
  • Tamarind paste-11/2 tsp.
  • Turmeric powder- 1/2 tsp.
  • Salt- 1 tsp.
  • Asafoetida- a pinch.
  • Gingelly Oil- 2tsp.
  • Mustard seeds-1/2 tsp.
  • Toor dhal-1 tsp.
  • Fenugreek seeds-1/2 tsp.
  • Red chillies-2.
  • Curry leaves-an arc.
  • Rice flour- 1tsp.(optional)

Method:

  1. Peel the skin from 2 clementines.
  2. Heat oil in a pan and add mustard seeds.
  3. After the mustards splatter, quickly add thoor dhal, fenugreek, red chillies, curry leaves, asafoetida.
  4. Then add clementine peel and saute for a minute.
  5. Now add sufficient water( 2-3 cups), and add tamarind paste.
  6. Allow it to cook for 5 minutes.
  7. Then add sambar powder, salt and turmeric.
  8. Let it simmer for 1/2 hour.
  9. The kuzhambu gets thick. If it is still thin, rice flour can be mixed with water and added(Only if required, as it could affect the original taste).
  10. Turn the heat off, cover it so, the aroma doesn’t escape.
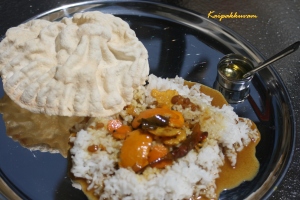
  11. Serve with plain white rice, sutta appalam and gingelly oil.

Note:

  1. This is just like wine. The older the better. Vatha kuzhambu always tastes better the 2nd and 3rd day after you cook it.
  2. Can be enjoyed as side for Curd rice.
  3. My mom usually makes some cooked Thoor dhal, so we can enjoy some parupu saadham with vathakuzhambu.

Read Full Post »

Panchamirtham

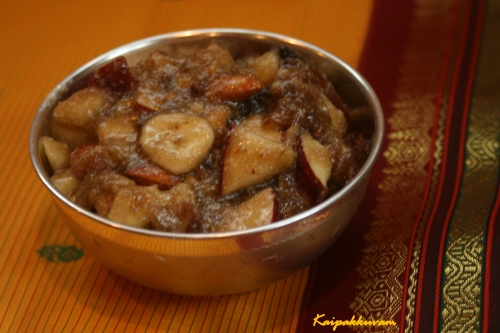
Panchāmirtham/ Panchāmrutham means Five nectars. “Pancha”-five, “Amrutham”-Nectar. I guess, this is the closest to Amrutham- the divine nectar, consumed by devas. The devas and the asuras (gods and demons) united in their efforts to churn the celestial ocean of milk Ksheerasaagaram in quest of Amrita (the nectar of life and immortality). Must have been a humongous task. Our Panchāmirtham tastes as divine as Amrita, but the preparation is a snap.

Panchāmirtham is the holy prasad in palani Murugan( Subramanya Swamy) temple. It  is used for Abhishekam( Bathing the God). Palani Panchamirtham and Sabari mala’s, “Aravana Paayasam” are the most wonderful form of prasaads ( prasadham), that can take the place of  man made amritam.

Panchamirtham

Palani Panchāmirtham is the oldest form of jam or fruit mix and preserves very well, even for months. The secret lies as much in the art of preparing it as in the quality of the fruit that is used as the basic ingredient. It is the small sized viruppāchchi plantains which account for it, the reason being that they have very little water content. Incidentally, Viruppāchchi is the name of a village (in the Palani Hills) where this particular variety of plantain is grown and marketed. Crushed plantains apart, Panchāmirtham consists of kandasari sugar from Kangeyam area, dates, kismis, sugar candy (kalkandu), cardamom and ghee in proper proportions.( from Palani.org)

It was my daughter’s birthday last week. Had a small Sai Bhajan at home. Decided to make panchamirtham for the prasad. Holy goodness ! It’s the most delicious thing I have ever made. The aroma while making it gave me a feeling that I just had a darshan of Lord Muruga.

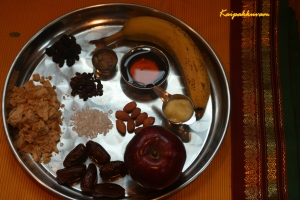
Ingredients:                                  Cooking 037

  • Banana- 1.
  • Raisins-1tsp.
  • Dry dates- 6.
  • Apple-1.
  • Jaggery- 3/4 cup.
  • Honey-1/4 cup.
  • Ghee-3 tsp.
  • Kalkandu or sugar candy- 1tsp.
  • Cardamom powder-1/2 tsp.
  • Almonds- 6( optional)-Indu’s touch.
  • Pomegranate seeds- 1tsp (optional)-Indu’s touch.

Method:

  1. Chop banana and apple into small pieces.
  2. Mix all the ingredients in a clean dry bowl, with a ladle, adding honey and ghee at last.
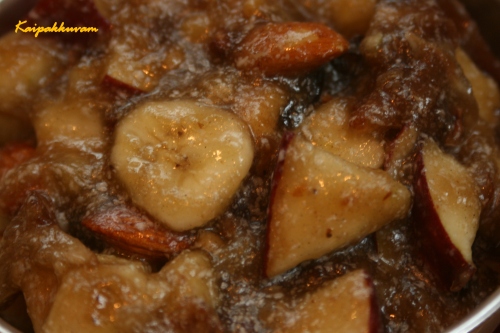
  3. Mix them to a consistency shown in the above picture, until the jaggery kind of dissolves.
  4. Store in an airtight container and enjoy.

Note:

  • The five ingredients that go into making the panchamirtham is really debatable. There are versions that add Cow’s milk, Curd/yogurt, Cane Sugar, Coconut scrapes. However, adding milk and yogurt, would make the panchamirthamtoo pasty and panchamirtham can get spoilt quickly.But from my understanding, the five main ingredients that are needed to make panchamirtham are banana, honey, jaggery, kalkandu and ghee.
  • I added almonds to give some richness and crunch- and to lower LDL cholesterol-(LOL).
  • I also added Pomegranate seeds for a boost of antioxidants and Vit B5. Pom seeds are believed to cure cardiovascular diseases and breast cancer.
  • Other ingredients like fresh grapes, chopped jackfruit, Cashew nuts and even Tulsi leaves, edible camphor(pacha karpooram) can be added for that extra pizazz.
  • Use banana that is firm and not too soft.

Read Full Post »


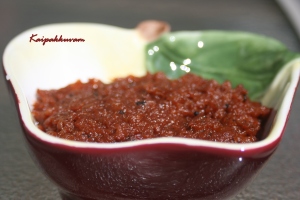
Apple thokku

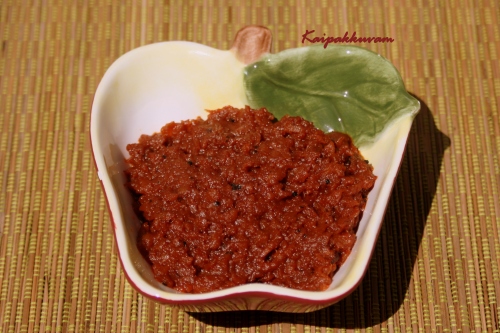
Every year during autumn, we go on a “Pick your own -Apple picking trip”. We love to go to the apple Orchard and taste all the varieties of apples from there. You are allowed to eat  any number of apples from there and bring home some in a bag you purchased. A 20 $ bag would hold close to 40 apples. “An apple a day keeps the doctor away” – I try telling this to my family to encourage them to eat at least one a day, but nobody seems to eat it.I usually give the sweet ones away to neighbours and make apple juice etc. Still, how many apples can one eat. So, the sour ones, I would typically end up making  Apple thokku or apple pickle, by scraping the apples and mixing it with spices and cooking it to perfection.This is one thing, I husband would offer to help me coz, he absolutely loves this healthy and tasty pickle.

  Ingredients:                                               Apple Thokku

  • Apples sour variety- 20.
  • Fenugreek seeds-1/2 tsp.
  • Gingelly oil (Sesame oil)-4 tblsp.
  • Mustard seeds-1tsp.
  • Asafoetida-1/2 tsp.
  • Turmeric Powder-1/2 tsp.
  • Red Chilli powder-1 & 1/2-tblsp.
  • Salt-1&1/2.

Method:

  1. Dry roast the fenugreek seeds ( methi or venthaya) and powder it to a fine powder.
  2. Have all the other ingredients ready.
  3. Peel the skin of the apple and remove the pith. Apple corer can be used.
  4. Scrape them, with a scraper and cover them, so they don’t get oxidized.
  5. Keep 1 tblsp oil in a pan(Kadai), add mustard seeds.
  6. After they splatter, add scraped apples, salt, turmeric, chilly powder, asafoetida and cook well.
  7. Add the rest of the oil slowly as it cooks. It might take about 1/2 hour to cook.Keep stirring with a ladle.
  8. Add Fenugreek powder at last.
  9. When the thokku rounds up and doesn’t stick to the pan, its done.
  10. Let it cool for sometime and can be stored in an airtight container.

Enjoy this delicious pickle with bread toast, chapathis, parathas, mixed with plain rice, curd rice etc. Sour green apples are just perfect to make apple thokku. I am sure you will be licking your fingers, after tasting this thokku.

Note: If you do not have gingelly oil, can also be done with vegetable oil or even olive oil.

Read Full Post »


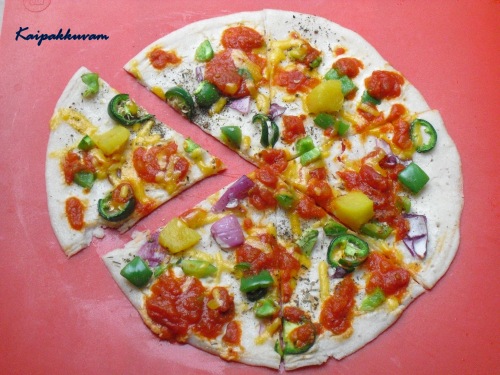
Pizza Dosai

Pizza Dosai

You had a tough day at work……….  Got home very late in the evening……… Your kid is hungry and screaming for dinner……….. You don’t have time or the energy to prepare dinner………… You don’t have any leftovers……… You suddenly remember some Dosa dough, you kept in the fridge…….. You offer to make dosas for your kid………. You kid refuses to have them and starts screaming again……… Trust me this can happen!

You can magically transform their screams into smiles to offering them Pizza instead of Dosa!  I tell her “hey, Let’s have a Pizza Party” and she is in all smiles!

Ingredients:

  • Dosa Dough- same as idli dough, mentioned in my previous post. I use the top layer of the dough for idlis and bottom for dosas.
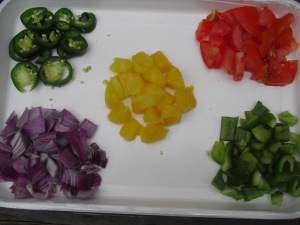
  • Veggies used in pizza (Onions, tomatoes, green peppers, (Jalapenos), pineapples).
  • Pizza sauce or pasta sauce.
  • Spices like oregano, basil.
  • Cheese-3-4 tblsp.
  • Chopped garlic-1 pod.
  •  Olive Oil-1tsp.

Procedure: Pour the dosa dough in a circle and add the sauce, chopped garlic and toppings, spices and cheese and add oil in sides to cook and cover it with a lid, so it gets cooked.  No need to toss and cook the top part.  Cut it with a pizza cutter and enjoy!

Cooking 018

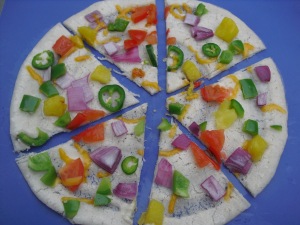
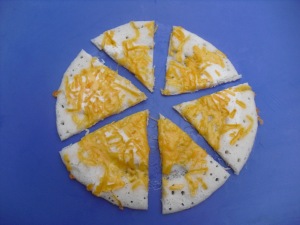
Variation withour sauce

Variation without sauce

 Note: If you want it to taste more like dosa, avoid the pizza sauce and Italian spices.


Cooking 029

Note: My daughter loves the plain cheese version.

Read Full Post »